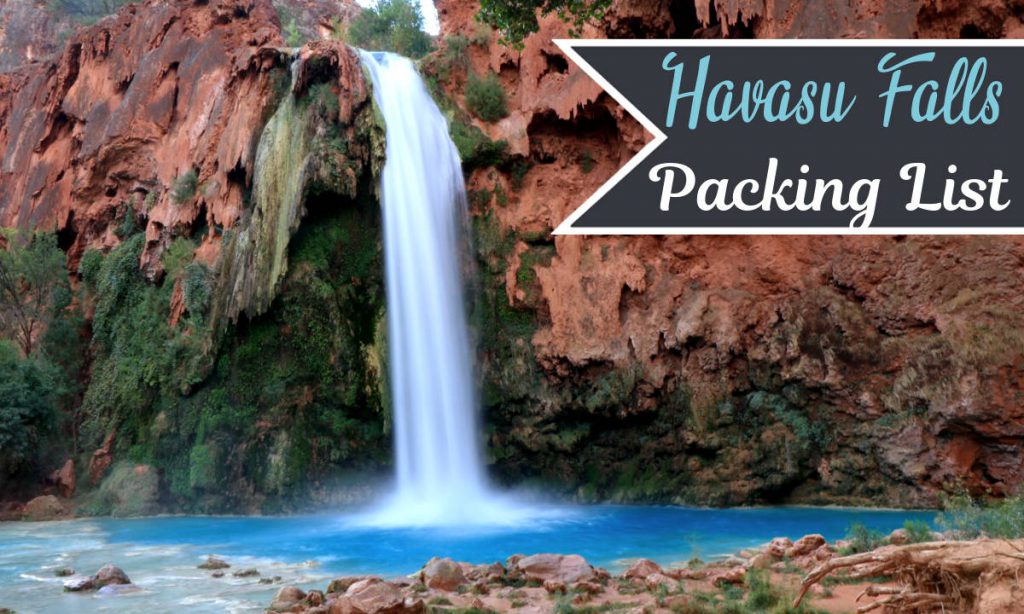
I have a confession to make…. I’m a total city girl. I’ve been “frontcountry” camping once or twice — with a fancy RV and a campground complete with public restrooms and a swimming pool — but visiting Havasu Falls was my first time doing “backcountry” camping. Suffice to say, my mom and I had a lot of preparation we needed to do. Check out my Havasu Falls packing list to see everything we decided to bring, what we wish we would have brought, and what we wish we would have left at home.
Disclaimer: This post contains affiliate links. Find more information about affiliate links on our policy page.
Jump To:
- How to Use This Packing List [READ FIRST]
- Taking Advantage of REI
- Where to Buy Everything Else
- Havasu Falls Packing List
- What Not To Bring
- Additional Resources
How to Use This Packing List
If you weren’t aware, there are three ways of getting your stuff into Havasupai — regardless of whether you are camping or staying at the lodge. The option you choose will affect which items on this list you should bring. The three options are:
- Carry It
- Use a Pack Mule
- Take the Helicopter
If you choose to carry all of your stuff, you’ll want to be very minimalistic and conscious of the weight of each item. If you choose to use a pack mule or helicopter, you won’t have to worry about it as much.
Recommended items on this list will also vary based on whether or not you are staying at the lodge or at the campground.
For this reason, I’ve specified which items are recommended for which type of visitor. You can see examples of how I’ve done this below. The first is an item that is only needed by those staying at the campground. The second example is an item that should only be brought if you don’t have to worry about carrying it for extensive distances – i.e. you are using a pack mule or taking the helicopter.
Camping Tent
- Campers: REI Camp Dome 4
- Lodgers: Not Recommended
Camp Chairs
- Hikers: Not Recommended
- Pack Mules/Helicopter: [Item Name]
Taking Advantage of REI
When I started to do research into everything I would need to bring with me to Havasu Falls, I saw a lot of people mention the store REI over and over again. I had never heard of REI until then, but once I realized what an extensive collection of camping and backpacking equipment this place had, it quickly became my best friend. Not only did it have pretty much every item on my Havasu Falls packing list, but it also had additional resources I didn’t even know I needed, such as classes on basic camping and how to properly pack a camping backpack. If you’re new to backpacking and/or camping and don’t already have a lot of the equipment you’ll need, I suggest checking them out.

Membership
REI has a membership program, and unlike other stores that have membership programs, REI’s isn’t a yearly subscription. To become a REI member for life, you just have to pay a one time fee of $20 USD. As a member, you’ll get 10% back on purchases as an annual dividend, receive discounts on workshops, plus gain access to member’s only events. Trust me, you’ll make the $20 USD spent on membership back in savings almost immediately.
You can learn more about REI membership on their website.

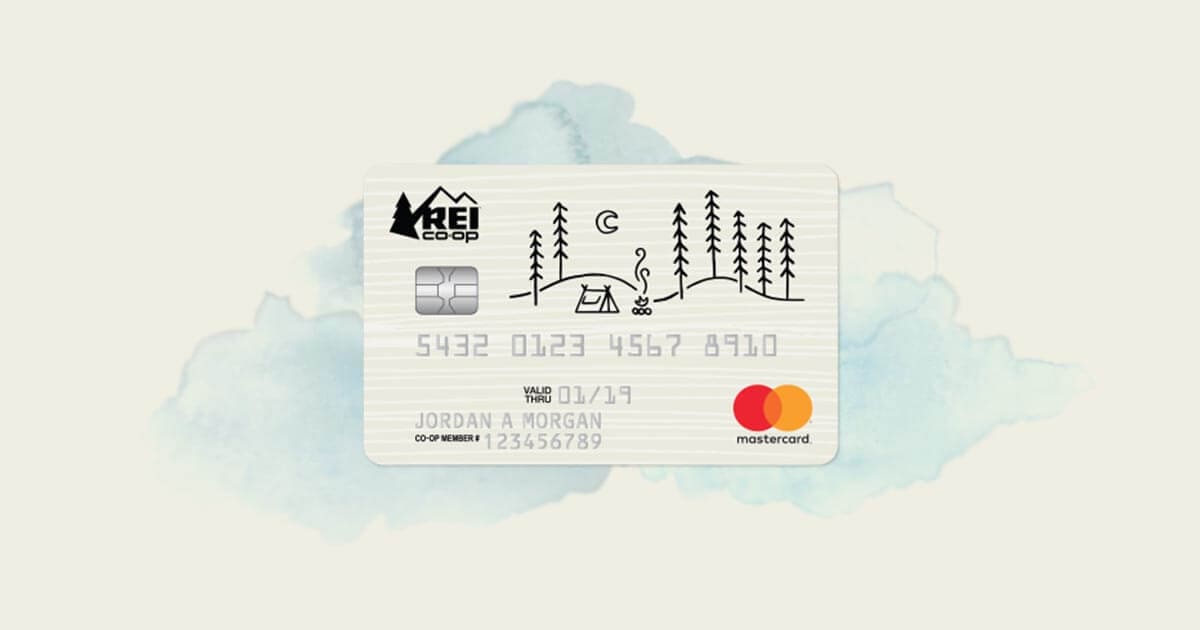
The REI Co-op World Elite Mastercard
The REI Co-op World Elite Mastercard has a few advantages:
- No annual fee
- No foreign transaction fees
- Earn 1-5% back on purchases
- Price protection
- Trip cancellation insurance
- If you’re approved and make a qualifying purchase within 60 days, you get a $100 REI gift card
- And more!
A lot of travel cards offer the same benefits listed above (although many travel cards have an annual fee). It was the gift card that drew my mom and I to the credit card.
We both applied and were both approved. Then we bought a few of the smaller things we needed on our Havasu Falls packing list. Once we received the gift card in the mail six weeks later, we went back to REI and bought the rest of the items that we needed.
If you have enough time before you depart for your trip and are good at managing money, I highly suggest looking into this card.
Events and Workshops
If you are brand new to backcountry camping, I definitely recommend checking out some of REIs classes and workshops. One of my biggest regrets is not taking the hike into and out of Havasupai more seriously. My mom and I took one of the REI classes, but I definitely think taking a few more of them would have better prepared us. Examples of some of the classes offered include:
- Backpacking Basics
- Lightweight Backpacking
- How to Pack a Backpack
- Beginner’s Camping
- Backcountry Tents and Sleep Systems
- Wilderness First Aid
- Backcountry Food Storage
- Backpacking Cooking
*Not all classes are offered at all REI stores
Garage Sales
One of the best parts about being an REI member is that you get access to their garage sales. REI hosts garage sales whenever they have a decent amount of equipment that has been used and returned to them (because REI allows you to return most items up to one year after purchase). All of the items have a tag on them indicating why they were returned. Sometimes items were returned for very good reasons (but can be fixed if you know what you are doing – such as inflatable sleeping pads having small holes in them), but other items were returned simply because people didn’t like them or weren’t needed any more. If you’re lucky, you’ll find some really great items at a ridiculously low price.
If you do plan on attending one of their garage sales, make sure you get there early! There is often a significant line of people before the garage sale even begins! All of the really good deals are likely to be the first things to go, so if you want to score some good deals, you’ll want to make sure you’re one of the first people in line!

Getting Your Pack Fitted
Even if you don’t buy any of your gear from REI, I at least recommend stopping in to get fitted for a backpack. In the various Havasu Falls related Facebook groups, I’ve seen people asking for recommendations for good packs. While brand, reputation, quality, and usability are all important factors that can be learned from others, at the end of the day, the fit of the pack is most important. It can be an amazing pack, but if it doesn’t fit your body, your hike will be miserable.
At REI, a store assistant will ask you the basics about your trip and then start recommending various packs based on your trip and experience. They’ll help you find the right sizes with different brands, and then fill the bags with weight so you can walk around with them and see how they feel. Based on your feedback, they’ll recommend other packs or help you start narrowing down the selection.
With this in mind, I’ve listed recommendations in the backpacks section of this Havasu Falls packing list based on brand, usability, and the other factors I mentioned above. Use these as a starting point when you visit REI and then make adjustments based on how they feel when you try them on.
Where to Buy Everything Else
We actually bought a lot of our supplies on Amazon. We were lucky enough to be able to get a few items pretty cheap during Amazon’s annual Prime Day event. Other things we chose to buy on Amazon simply because it was cheaper than buying it at REI. For any items that you need on this list, I recommend checking it out at REI first and then price checking it against other big shopping centers like Amazon.
Havasu Falls Packing List
We’ve covered how to use this list and where to get the stuff on this list, now it’s time to go over all what should actually be on your Havasu Falls Packing List.
Personal Items
Driver’s License
If you aren’t the primary name on the reservation you likely won’t need this. However, if your name is the one on the reservation, it’s very important that you bring your Driver’s License with you. If you do not have a Driver’s License, I would check with the Havasupai Tribe to see if there are other acceptable forms of identification.
Copy of Reservation Confirmation
I ended up not needing a copy of reservation confirmation as the tribe has this in their system. However, it took one of the staff memberships a minute to find our reservation because of a miscommunication as to what my last name was. I personally would bring a copy of your confirmation (printed or digital) just in case. If they don’t have your reservation for whatever reason, you’ll be sent home without a refund, so it’s best to have a copy to clear up any possible confusions.
Cash and Credit Card
Some shops are cash only, and other stores that accept credit and debit cards often have a minimum dollar amount you have to spend before you can use your card. As such, you’ll want to bring a decent amount of cash with you. Even if you bring enough food with you that you don’t need to shop at the stores, you may still want to buy other items such as souvenirs.
Despite many things being cash, we still brought our credit cards with us. They’re good for emergencies. For example, if you hike into Havasupai and realize the hike out will just be too much, you may want a credit card to pay for the helicopter (although it’s a tad bit more expensive to pay for the helicopter with a credit card instead of cash).
Medications
This one is straightforward. If you have any medications you take on a regular basis, bring them.
For now, don’t worry about things like pain relief and antihistamines. Those should all be included in your first aid kit (listed later).
I also recommend bringing any sort of “in case of an emergency” type medication you might have. For example, I have prescription steroids that sit in my medicine cabinet in case I end up with a bad (but not life-threatening) allergic reaction over the weekend when doctor’s offices are closed. Epinephrine (EpiPen) is another medication that comes to mind.
Remember that Havasupai is in a pretty remote area. There is a local clinic, but it could potentially take several hours to receive help in the event of a medical emergency.
Backpacking
Backpacks (Packs)
- Campers who are hiking in: 50L to 70L
- Pack Mules/Helicopter: 15L to 30L
What size pack you need will depend on whether or not you are planning to use a pack mule or helicopter to get in and out if Havasupai, and whether you are staying at the campground or lodge. If you are camping and plan on carrying everything yourself, you’ll likely want a 50-70 liter pack. Otherwise, you would probably be okay with just a 20 liter pack (and maybe some duffel bags).
As I mentioned above, I highly recommend stopping by REI to get properly fitted for a pack. Everybody is different. My mom and I went together to get fitted and we tried on probably four or five different packs. Each one felt very different, due to the different technologies used to support weight. Sometimes a pack felt comfortable for my mom but super uncomfortable for me, and vice versa.
In the end, my favorite hiking backpack was the Greggory Deva 60 Pack, while my mom’s was the Osprey Aura AG 50 Pack. For daypacks, I liked the Osprey Tempest 20 Pack and my mom liked the Osprey Skimmer 28 Pack.


Pack Cover
Whether or not you need this will depend on whether or not you care about your pack getting wet. I almost always had electronics with me, so if it were to start raining, I’d definitely be concerned about my electronics getting wet, especially if it were to suddenly downpour. Suffice to say, I always carried a pack cover with me. My mom, on the other hand, never really brought her pack cover on our various adventures to the different waterfalls.
If you decide that you do want a pack cover, you can find some pretty cheap ones on Amazon.

Hydration Bladder
- Hikers/Pack Mules: 3L or 4L Hydration Bladder
- Helicopter: 2L Hydration Bladder
You’ll want plenty of water to stay hydrated. This one is super important during any season, but is ESPECIALLY important if you a visiting during the hotter times of the year.
If you are lucky, the pack that you buy may actually come with a hydration bladder, so I would hold off buying this item until after you’ve purchased your pack.
If you aren’t so lucky, I would get no smaller than a 2L bladder. My mom had a 2.5L bladder (because that’s what her pack came with) and it was enough, but she would be out of water by the end of the day. It’s definitely better to have more water than not enough, so if you can afford the extra weight in your pack (because water is surprisingly heavy), I’d get a 3L or even a 4L bladder.


Hat
I’ve never been much of a hat person, but I was glad I brought one with me. In desert like conditions, any amount of shade can make a difference. Being able to keep my face out of the sun and keep me from squinting definitely helped. I wore a baseball cap, but my mom wore a wide brimmed hat that was able to keep the back of her neck out of the sun too.


Sunglasses
Like a hat, sunglasses will help protect your eyes from the sun. I also found that I squint less when I wear sunglasses, which is great because I often end up with headaches when I find myself squinting for extended periods of time.


Trekking Poles
I was adamantly against trekking poles in all the time leading up to our trip…. And regret it.
Not just when hiking, but in general I’ve always hated carrying things when I’m out and about. I feel like whatever is in my hand is always in the way and I’m setting it down somewhere so I can do something else (and then immediately forget to pick it back up and walk away without it). I’ve taken hiking sticks on some of the shorter hikes I’ve done over the years and always found holding it more annoying then helpful. I was 100% positive I was going to feel the same about trekking poles.
My mom on the other hand, bought a pair and brought them with her. Suffice to say, I ended up borrowing one of hers before the trip was over.
During the hike into Havasupai, I was good without them for the first 7 miles or so. However, the last couple of miles to the campground I definitely felt like I was dying. My legs just didn’t want to move anymore, so having the trekking pole for extra support was nice. Plus, on our various adventures around the waterfalls, we found ourselves occasionally climbing over rocks, and the trekking poles were able to give a bit more stability in areas where we maybe didn’t have the best footing.
Long story short, I’d recommend getting a pair even if you think you may not need them. Yes, even if you are taking the helicopter into Havasupai I would still get a pair, because they may be helpful on the hikes to the various waterfalls. If you end up not needing them, you can just attach them to the back of your pack where they’ll be out of the way.

Hiking Shoes
I can’t emphasize enough how important it is to have good shoes for this trip. You are going to be doing a significant amount of hiking (even if you opt to take the helicopter in and out, you’ll still do a significant amount of hiking to the waterfalls), so you want to make sure you have good shoes so you don’t have any injuries.
Every few months there seems to be a discussion in the various Havasu Falls Facebook Groups about the best shoes to wear. Some say to wear boots because they provide more ankle support and you don’t have to worry about rocks or sand getting in them. Others complained that boots would rub and cause blisters. The general consensus seems to be to wear whatever is comfortable for you. If you already have a good pair of shoes that you use for outdoor activities, I would just go with those.
If you don’t already have a good pair of shoes or you need new ones, make sure to buy your shoes well in advance of your trip. You’ll want plenty of time to be able to break them in before hand. Also, you may want to consider getting a half size up from what you normally get. This will give extra room in your shoe so that even if your feet swell or you wear thicker socks (or both), your toes won’t be cramped or rub on the shoe, which could potentially lead to blisters or black toe nails.

Water Shoes
You’ll definitely want to bring shoes that you are okay wearing in the water. Even if you don’t plan on doing any of the hikes that involve crossing water, you’ll still want shoes that you can wear when you swim at the various water falls. There are lots of rocks in the various swimming areas, and even those with good water shoes had trouble with slipping on the rocks. Many of the people I talked to during my time in Havasupai who didn’t bring water shoes regretted it.
If you don’t already own a pair of water shoes, check out this ultimate water shoes buying guide.
Knee Braces
For many, the large amount of hiking, especially on gravel and sand, is hard on the feet, knees, and hips. If you already struggle with knee or ankle problems, I highly recommend bringing a supportive brace.


Whistle
This is something I always carry with me no matter where I am for safety reasons. Many hiking backpacks have a small one built in, but I prefer my gym whistle because it’s much louder. Its sound is way louder than I could ever shout (and I have a pretty loud mouth), which can come in handy in the event of an emergency.

Camping
If you are staying in the Lodge, skip this section.
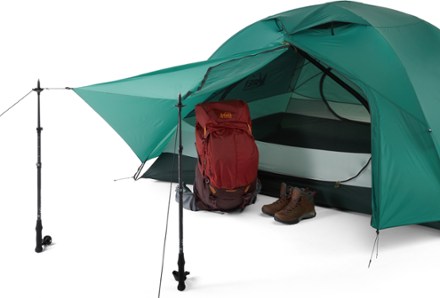
Tent & Footprint or Hammock
Depending on what time of the year you visit, you could get away with just bringing a hammock to sleep in instead of having a full tent. There are countless trees in the campground, creating hundreds of potential places to hang a hammock. However, I personally cannot sleep in a hammock. I’m jealous of those who can.
If you plan on sleeping in a hammock, I recommend bringing two rain-fly tarps: one to put over your hammock, and one to put over the rest of your stuff. While choosing to sleep in a hammock means less weight to carry (for those that choose to hike in as opposed to using a pack mule or helicopter), it also means that you won’t have any sort of shelter to protect you and your gear from the elements.
If you plan on bringing a tent, you’ll find that you have lots of options for types of tents. For those hiking in with their gear, the most important factor will be weight, as your tent will likely be one of the heaviest items in your pack. Unfortunately there is this annoying correlation: the lighter the tent, the more expensive it is.
If you can afford to carry the extra weight or are using a pack mule or helicopter, I recommend “sizing-up” for your tent. If two people are going, I recommend getting a 3-person or even a 4-person tent. A 2-person tent will have just enough space for two people to lay down side by side, and that’s it. I personally felt a bit like a sardine packed into a box when my mom and I checked out a 2-person tent. In the end, we got a 4-person tent which had enough room for both of use to lay out comfortably without bumping into each other. Plus, we even had enough room to keep our packs inside the tent at night to keep them out of the elements.
You’ll also want to get a tent footprint. This goes underneath the tent, helping prevent the bottom of the tent from ripping. It also adds an extra layer between you and the cold ground.

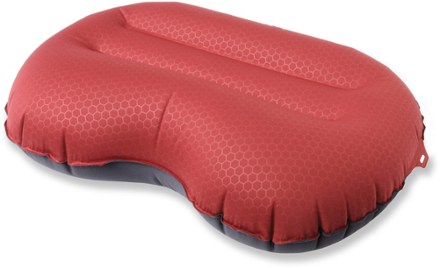
Camping Pillow
If you are on a budget or are being really conscientious of the weight in your pack, you could probably get away without a pillow. You could always just roll up your clothing as use that as a pillow, but if you’re anything like me, you’ll be incredibly uncomfortable. For those who are conscious of weight, an inflatable pillow will likely be your best option. If you have room and weight to spare, I recommend one of the rollup camping pillows.

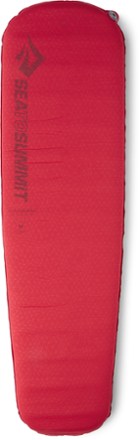
Sleeping Pad
Sleeping pads are not only important to help you sleep more comfortably than if you were to sleep on the hard ground, they also help provide insulation from how cold the ground can get at night.
This is another one of those items I recommend checking out at REI first because everybody is different. Most REI stores will have several setup that you can lay on and see how comfortable they are for the make of your body. Being able to get a good night’s rest will be essential for enjoying your trip.

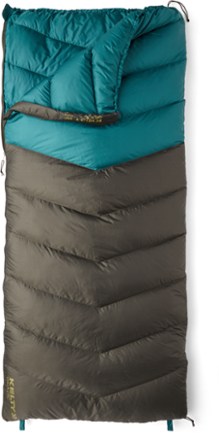
Sleeping Bag or Blanket
If you are heading to Havasu Falls during the colder months, you’ll definitely want to make sure you bring a sleeping bag with you. Otherwise, you may be able to get away with bringing just a blanket.
The temperatures at Havasupai do drop significantly at night, but it’s not like it drops to -20˚F. I’d take a look at the average high and low temperatures for Supai, AZ and then decide whether you want a sleeping bag or blanket.
We went in September, where temperatures can be as high as 95˚F and drop as low as 60˚K at night. As somebody who is not used to 95˚F+ temperatures, I welcomed the temperature drop at night and was perfectly content with just a light blanket at night. However, for people who come from warmer parts of the world, 60˚F might seem pretty chilly.

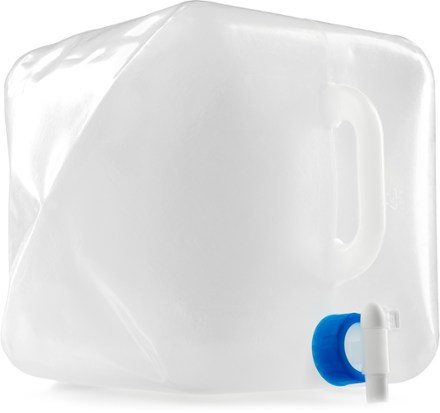
Collapsible Water Jug
- Hikers: Not recommended
- Pack Mules/Helicopter: 4 Gallon Water Jug
There is only one clean water source in the campground (assuming you don’t have a water filtration system – in that case you can get water from the river), and it’s towards the beginning of the campground, so if you end up camping further back, it can be a bit of a hike to get to the water spout. However, if you have a water jug, you can fill it up and keep it at your campsite so you don’t need to head back to the water spout every time you need water.
It’s definitely super convenient, so I would take one if you are using the pack mules or helicopter to get into the canyon. However, even when its collapsed, it can be a bit big and bulky and would take up significant space in your pack, so I wouldn’t recommend it for those planning to carry all of their camping gear with them on the hike into Havasupai.
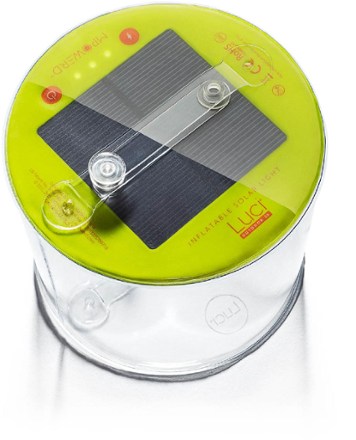
Inflatable Light
- Hikers: Not recommended
- Pack Mules/Helicopter: Luci Lantern
Due to the high canyon walls, you’ll loose sunlight pretty quickly once the sun starts going down. However, most people aren’t quite ready to go to bed yet when the sun goes down, so having a few lights around camp will let you continue to hang out, play cards, or whatever else you want to do around camp until you’re ready for bed.
At the end of the day though, inflatable lights are just one of those “nice to have things”. If you really need light, you could just use a headlamp (see the Gear and Supplies section).
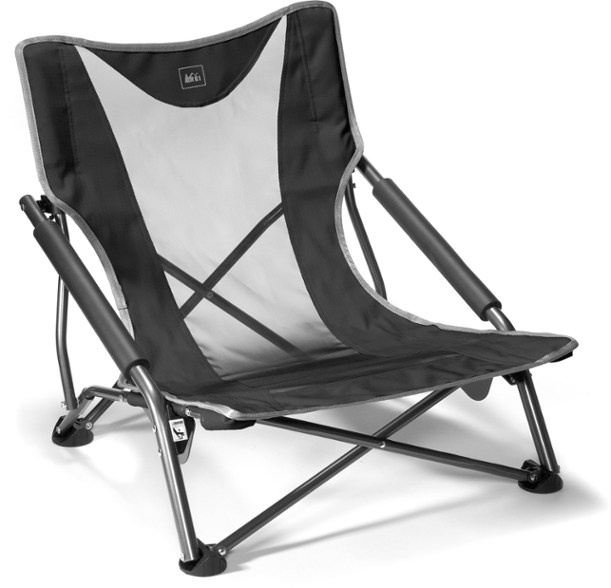
Camp Chairs
- Hikers: Definitely not Recommended
- Pack Mules/Helicopter: REI Camp Chair
There are a lot of picnic tables around the campground, so if you setup camp near one of the tables, you can just use that for seating. However, if for some reason you are not able to setup camp near a picnic table, camping chairs could come in handy. Even if you do camp near a picnic table, the camp chairs can still be nice to lounge in around camp or at the waterfalls.
I would 100% not recommend these if you plan on carrying everything during your hike into Havasupai. Even for those who are taking the helicopter or using the pack mules, these aren’t really necessary. They’re just kind of a bonus.
Food and Cooking
If you are hiking into the canyon (and not taking the helicopter), you’ll want to make sure you have some snacks for the hike in and out, but the rest of the stuff in this section is optional.
How is food optional? Well, there is a store and café located within Supai village which are typically open 8AM to 5PM (although hours van vary). If you don’t want to have to worry about bringing food and cooking utensils with you, you can just purchase food after you arrive at the village.
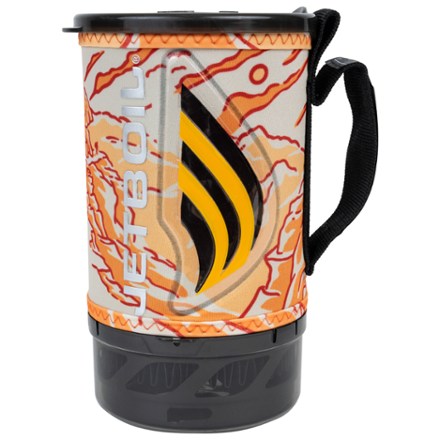
Camp Stove & Fuel
- Campers: Jetboil
- Lodgers: Not Recommended
If you’ve never seen a camp stove, they allow you to boil hot water. You might be thinking to yourself, “that’s it?” I can’t actually cook anything else? Well, just having boiling water suddenly opens up a lot of possibilities in terms of food and drink options.
I would check the Facebook Groups before purchasing camp stove fuel. When we went, there were crates upon crates of leftover fuel from previous campers.
For camp stoves, the Jet Boil is one of the most popular options.
Cooking/Eating Utensils
- Campers: Collapsible utensils
- Lodgers: Not Recommended
This one is pretty straightforward. If you plan on cooking your own meals, you’re going to want utensils to eat with. Using a spork instead of spoon and fork, and getting a collapsible cup can help save some space in your pack.

Meals, Snacks & Drinks
- Campers: Meals, drinks, and snacks
- Lodgers: Snacks
Having a camp stove will open up a significant number of options for meals. However, as you’re putting food together to bring with you on your trip, know that one of the tops things Havasu Falls hikers regret bringing is too much food. Chances are, you will need the following meals:
- Dinner the day you hike in
- Breakfast your first full day
- Dinner your first full day
- Breakfast your second full day
- Dinner your second full day
- Breakfast the day you hike out
Most Havasu Falls hikers will simply snack throughout the day instead of eating lunch because they’re out adventuring.
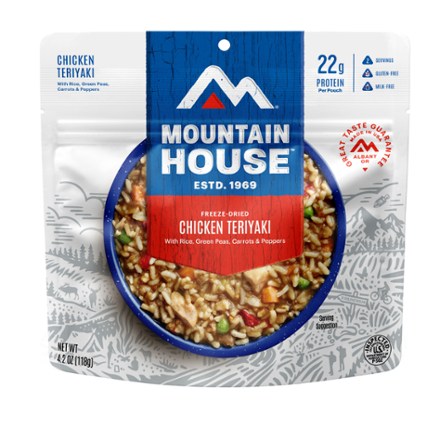
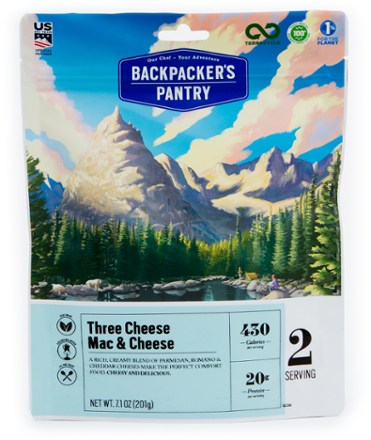
For freeze dried meals, many people recommend Mountain House. Another popular one is Backpacker’s Pantry. However, I highly recommend picking up a meal or two before your trip and making them at home just to make sure that you’ll like the food (as much as you can like freeze dried meals). After trying a few, my mom and I decided to just do things like instant ramen and oatmeal.
If you do decide to bring freeze dried meals, many hikers will actually even take the food out of the packages and put them in plastic bags instead to save room in their packs.
For drinks, you could make tea, hot chocolate, and even coffee.
As for snacks, you’ll definitely want to have plenty not only for the hike in and out of the canyon (assuming you aren’t taking the helicopter), but you’ll also want snacks to take with you on your various adventures around the Supai area. Things like peanuts, granola, trail mix, beef jerky, and generally salt foods make for great snacks.
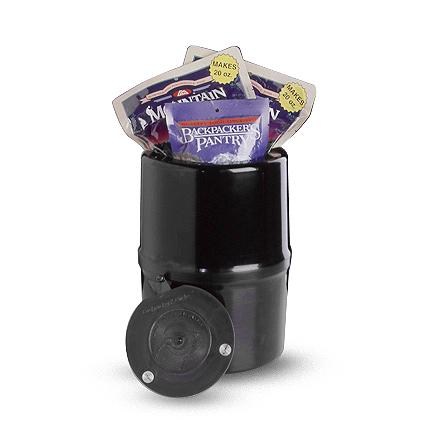
Food Storage
- Campers: Bucket and lid
- Lodgers: Not Recommended
Havasupai doesn’t have any bears that you have to worry about, but the squirrels can be just as bad. They’re absolutely relentless. They will chew through tents, packs, and anything else they can in order to get to food.
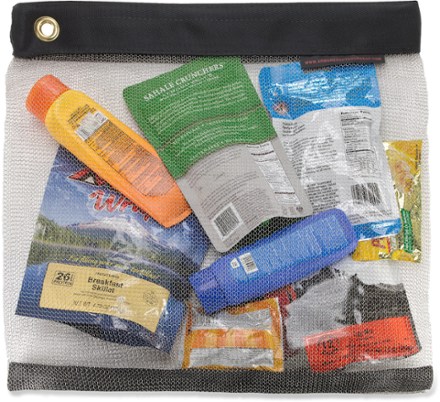
Regardless of whether you are staying at the lodge or the campground, I recommend getting an odor proof bag for the food and trash that you’ll be carrying with you throughout the day.
For those who are camping, you’ll need to worry about not only the food you are bringing on your adventures, but also the food you’ll be leaving behind at camp.
When I was there, there were lots of buckets and lids that could be used for storing food. I recommend checking the various Havasu Falls Facebook Groups to confirm that there are buckets available before you go. If you choose to use a bucket with a lid, I still recommend stringing it up between two trees. Many people just set a lid on top of the bucket and then set a hard rock on top (because most of the lids don’t perfectly fit the buckets), but some people still had issues with critters getting into these.
In case there isn’t any buckets with lids that fit, I recommend bringing a bear canister. It’s got some weight to it, but is probably one of the best ways to ensure that your food remains safe.
A lot of people recommend putting your food in a rat sack. It’s lighter than a bear canister and is strong enough that the critters can’t chew through them. However, they can still claw at the food through the mesh. They won’t be able to actually get the food and run with it, but they still managed to rip up one of my Pop Tarts pretty good. However, if you string it up correctly, it should work just fine. It’s a decent alternative if you don’t want to hike in with a bear canister and can’t find any buckets with matching lids.
Clothing and Accessories
Hiking Clothes
Aside from bringing too much food, one of the most common things you’ll hear people say they brought too much of is clothing. Those who return from their trip often recommend future hikers only have two outfits — the one you wear on your hike and one in your bag. Just mix and match throughout the days. Nobody else is going to be paying attention if you wear the same outfit two days in a row. Besides, you’ll likely be in your bathing suit half the time anyway.
Keep Fabrics in Mind!
When I first started researching what clothes to bring with me and wear during the hike in and out, I heard the term “quick dry” a lot. Sure, I can understand the desire for clothing that dries quickly, and hiking in wet clothing is not only uncomfortable but makes blisters and chaffing more likely. But, do you really need to “quick dry” clothing on your Havasu Falls packing list?
If you’re an avid hiker (or plan to be in the future) it might be worth investing in some higher end fabric clothing like merino wool. It does a great job of regulating temperature (so you stay cooler in the heat and warmer in the cold), is lightweight, is wrinkle resistant, and doesn’t smell as quickly as typical cotton clothing. It’s technically not a “quick dry” fabric, but it is definitely one of the best at moisture wicking (brings moisture away from your body).
Unfortunately, fabrics like merino wool are not only expensive, but also require special care (you can’t put them in the dryer). Alternatively, you could go with nylon and polyester fabrics. They’re not as odor resistant, but they’re quick drying and wick away moisture well. Honestly, any workout clothing hanging in your closet would probably do quite well.
At the end of the day, all you need to remember is to avoid cotton. Cotton clothing is okay when you’re just hanging around the campsite, but for the hike in and out of Havasu falls, you’ll definitely want to avoid it. It doesn’t wick moisture away, wrinkles easily, and doesn’t dry quickly.
Swimsuit
Chances are, you’re going to Havasu Falls to see the waterfalls, right? Unless you plan on just sitting on the side, you’ll probably want to bring a swimsuit with you on your trip.


Towel
Like with clothing, getting a towel made from quick-dry material will help you dry off quickly but won’t stay sopping wet for hours after you get out of the water.

Gear and Supplies
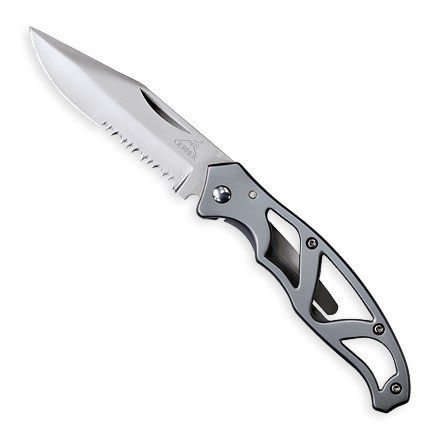
Knife
- Campers: Pocket knife
- Lodgers: Optional
A knife can come in handy for all sorts of different reasons such as cutting paracord or pieces of duct tape.

Paracord
- Campers: 50 feet
- Lodgers: Not Recommended
As mentioned above, the critters at Havasu Falls are ruthless. They’ll chew through practically anything to get to food. For that reason, it’s often best string up anything you don’t want to worry about wildlife getting into. Paracord is one of the best things to use to do this. Sometimes campers will leave Paracord behind for the next campers who come to Havasupai, but I wouldn’t count on it, and plan to bring your own. Always practice the “leave no trace” rule.

Carabiners
- Campers: At least 3 carabiners
- Lodgers: Not Recommended
Once you have paracord hung around your camp, you can use carabiners to hang things such as your back on the paracord. Without them, you’ll likely have to untie the paracord every time you need to hang something up or get something down.

Duct Tape
Duct tape is good for patching a torn tent, sleeping pads with holes, and punctured water bladders (so even people staying in the lodge should bring some). However, instead of bringing an entire role of duct tape, most hikers will just cut a few pieces that they put on their water bladder, which can then be peeled off an reused when necessary.
First Aid Kit
Depending on how much is in your first aid kit, you may want to bring additional pain relief medications. After all the hiking you’ll do around Havasupai, you’ll definitely want them. You may also want to consider bringing extra antihistamines for allergies or bug bites if you are sensitive to that kind of stuff.

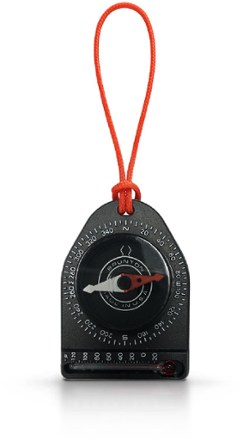
Compass
While there aren’t any “defined” trails, there have been enough travelers before you that the paths are pretty obvious. I think you’d have to intentionally try to get lost. It’s definitely not recommended to wander off these trails, but most people recommend having a compass just to be safe.
Headlamp or Flashlight & Extra AA/AAA Batteries
- Campers: Headlamp with multiple light options
- Lodgers: Not Recommended
Campers will definitely want to bring headlamps with them. You loose sunlight pretty quickly during the day thanks to the high canyon walls, and there aren’t any lights in the campground, so you’ll need things like flashlights or headlamps to be able to see. Most people opt for headlamps so that they can keep their hands free. It just makes things like playing cards and visiting the compost toilets so much easier.
If you get a headlamp, it is highly recommended that you get one that has a red light option. It still allows you to see without disturbing the other campers around you who may be trying to sleep.
Plus, don’t forget to bring some extra batteries with you just in case your headlamp dies in the middle of your trip.

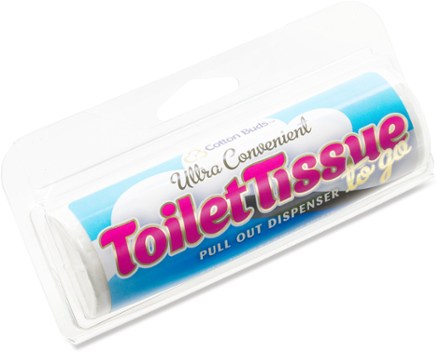
Toilet Paper
- Hikers/Pack Mules: To-go toilet paper
- Helicopter: Not Recommended
So… there aren’t any compost toilets or anything on the hike into and out of Supai. It’s an eight mile hike from the hilltop to the village, and there aren’t any facilities along the way. This means that if you have to use the restroom along the way, you have to do your business out in nature. For those who don’t want to use leaves, to-go toilet paper can come in handy. Just make sure to pack out any used toilet paper.
Duffel Bags
- Hikers: Not Recommended
- Pack Mules/Helicopter: WANDF 36″ (120L) Foldable Duffel Bag
If you are staying in the campground but not planning on carrying all the camping equipment, you’ll want a couple of duffel bags to put all of your camping equipment in (or really anything you won’t need while heading into the canyon). These duffel bags can then either be put on the pack mules or in the storage section of the helicopter.
For the pack mules, fully packed duffel bags may not weigh more than 32 pounds. They also must not be more than 36 inches long, 19 inches wide, and 19 inches tall.

Electronics
Cell Phone & Charger
The chances of getting cell reception in Havasupai, especially the campground, are pretty slim. However, I still recommend bringing yours with you in case of emergency (and there are a few spots you may be able to get service if you’re lucky). I kept mine with me at all times but kept it on airplane mode.
Portable Charger
If you plan on bringing any electronics with you, I would also bring a fully charged portable charger with you. There are places in the village where you can plug in to charge electronics, but I don’t think you want to spend your time in Havasupai hanging out at the café waiting for your phone to charge.
I would not recommend a solar charged portable battery. Sunlight can be hit or miss at Havasupai, and several people have complained that there was not enough sunlight to charge their portable batteries. Instead, I’d get a large portable battery (one that can charge your phone several times over) and call it a day.

Camera and Accessories
I’ve seen a lot of discussions in the various Havasu Falls facebook groups about whether they should bring their DSLR camera or just use their cell phone for pictures.
Unfortunately, I can’t make that decision for you. I’m big into photography, so I definitely wanted to bring my DSLR camera, but if you just want some pictures for memories, then your cell phone would probably work just fine (especially the cameras on cell phones have gotten substantially better over the years).
For my crop-sensor DSLR camera, I brought my wide angle lens (10-18mm) and my standard or “kit” lens (18-55mm). Unless you plan on photographing some of the wildlife, you probably wouldn’t need a telephoto lens.
Given that there really isn’t an easy way to charge a camera battery in Havasupai, I definitely recommend bringing an extra battery (maybe even two depending on how many pictures you plan on taking).
Also, if you plan on photographing the waterfalls, you’ll probably want to bring a lightweight tripod with you.
Lastly, if you plan on hiking into Havasupai (instead of taking the helicopter), I HIGHLY recommend getting a camera clip. Even if you plan on using a pack mule, I’d keep your camera equipment with you for a couple of reasons: 1) there are a lot of cool things to take pictures of during the hike in and out of the canyon and 2) the bags for the pack mules get tossed and jostled and you wouldn’t want your equipment to get damaged. Having a camera clip will allow you to keep your camera on you without having to fit it in your pack or carry it in your hand.


Miscellaneous Items
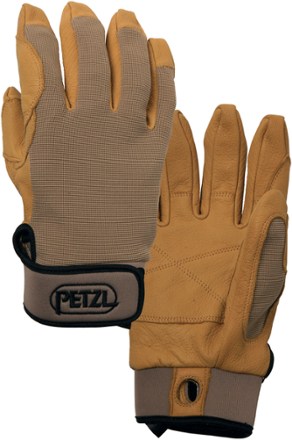
Climbing Gloves
If you plan on visiting Mooney Falls, Beaver Falls, or hiking to the confluence, you’ll practically have to scale a cliffside to get there. It’s not so bad as long as you have good mobility range in your knees in hips. Just make sure to go slow. However, many people recommend having climbing gloves because the cliffside is right next to Mooney Falls, so parts of the cliff and get a little slippery.
Sunscreen
There is practically zero shade on the trail in and out of Supai. Even the trails to the various waterfalls offer very little shade, so it’s important to wear plenty of sunscreen!
Insect Repellent
Whether you need insect repellant will depend on the time of year you visit. However, if you’re anything like me (I get eaten alive even when nobody else does), you’ll want to bring insect repellent no matter the time of the year.
Chapstick
Pretty straight forward. You’re going to be in a pretty dry climate, so you might want some chapstick.
Baby Wipes
- Campers: Put several in a ziploc bag
- Lodgers: Not Recommended
For campers, there won’t be any place to take a shower while you’re in Supai. Plus, things like shampoo and body wash are forbidden because they can be harmful to the waterfalls and environment. For this reason, you’ll probably want a few baby wipes to wash yourself if you get particularly dirty.
Tissues
I don’t know about you, but I tend to get nose bleeds in arid climates. Having a few tissues can come in handy.
Combination Locks and Safety Tether
Whether you brings this is up to you. I personally wasn’t comfortable leaving my daypack unattended while swimming in the waterfalls. I’d like to believe that people are nice and won’t steal anything, but I’ve had things stolen while traveling often enough to know better. Honestly, I doubt anybody would steal anything if only because it’s more to take with them on their hike out. Still, I felt better securing my daypack. I brought a safety tether to wrap around a tree and through the loops of the book bag so that nobody could walk off with it, and I used combination locks to lock the zipper shut.
As I’ve said a couple of times now, if you plan on walking away from your pack, make sure there isn’t anything with an odor inside. This includes not only food but even things like sunscreen, toothpaste, etc. The critters WILL chew through your bag to get to them.

Entertainment
In the various Havasu Falls Facebook groups, I often see people say that they wish they brought more for entertainment. As I’ve said a few times, the sun can go down kind of early depending on the time of year, and it’s definitely not safe to be out hiking after the sun goes down. At this time, a lot of people will head back to camp or to the lodge and just hang out. Having non-electronic forms of entertainment such as a deck of playing cards or a sketch book can keep you entertained until you’re ready for bed.
Zip Lock Bags
You’ll want these to put any trash in (such as used tissues, toilet paper, baby wipes, etc). Always remember the leave-no-trace rule. Pack out what you pack in (that means taking all your trash with you).
What Not to Bring
Forbidden Items
Note that the forbidden items listed on the Havasupai Tribe website are not permitted anywhere within Havasupai, even at the Trailhead. When you arrive at the trailhead, you will have to go through security, who will likely do an inspection of the things in your car.
When we arrived at the security checkpoint, the guy in the car ahead of us had a brand new bottle of expensive liquor he bought in Las Vegas before heading to Havasupai. It didn’t matter that he was planning on leaving it in the car when heading into Havasupai. He was given the option to either forfeit his reservation or dump out the bottle of liquor.
Do yourself a favor… If you have other travel plans before arriving at Havasupai and you pick up any items along the way that will be forbidden, ship them home.
Body Wash / Shampoo / Conditioner
If you are staying at the campground, there won’t be anyplace to take a shower. However, please note that soap and shampoo of any kind is not permitted in or near the campground or creek. This is because the chemicals in these types of items can damage the waterfalls and general environment.
Additional Resources
If you haven’t already, I recommend joining the various Havasu Falls Facebook Groups. They all were extremely helpful to me when planning my trip and can help provide you with some of the most up to date information. It’s also a great place to ask questions you can’t seem to find the answers to.
Official Havasu Falls Facebook Group: Havasupai and Havasu Falls
Transfers and Cancellations:
- Havasupai Reservations and Cancellations
- Havasupai Reservations – Transfers and Cancellations
- Havasupai Reservation Transfers
Group for general Havasu Falls discussions and questions:
Groups for specific month of your reservation:
Groups for Pack Mule Reservations discussions and questions: Pack Mules
Liked this article? Pin it to Pinterest!